
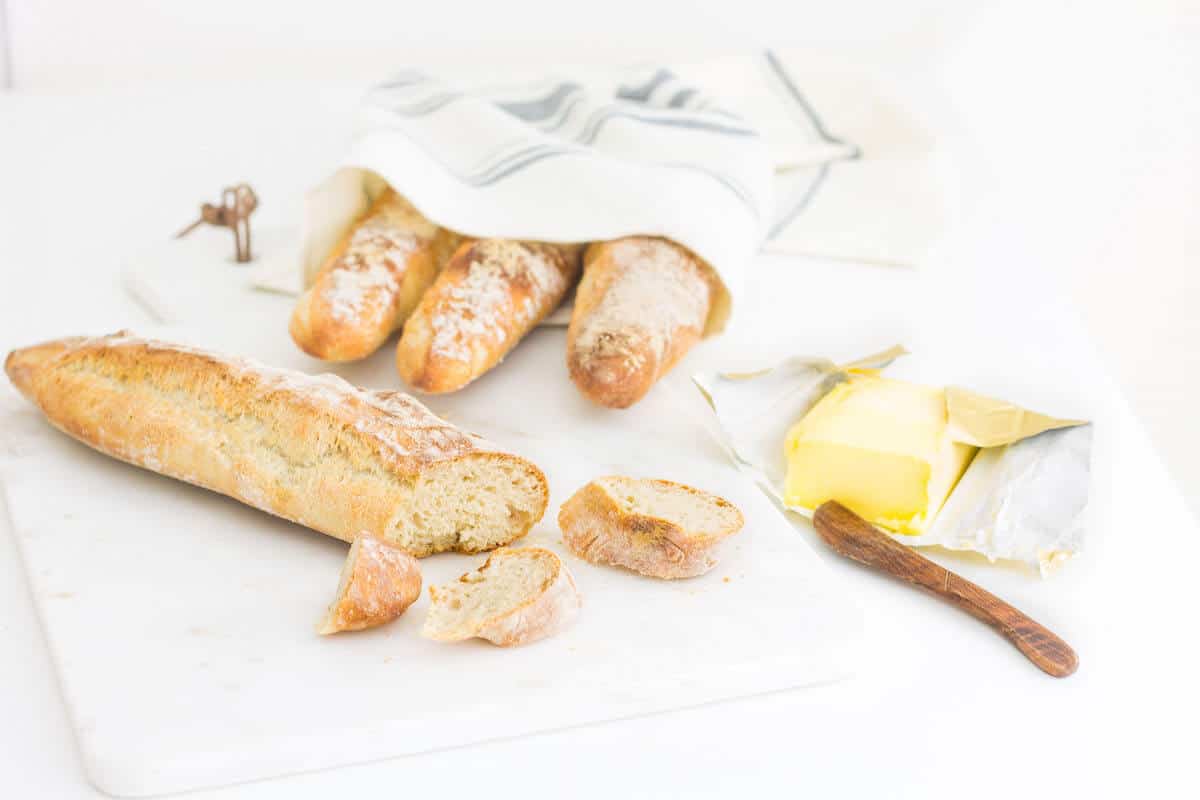
French Baguettes Made at Home
These French baguettes are everything I love about French bread and Paris! With a crisp exterior and fluffy interior, you’ll find yourself turning to this easy baguette recipe for homemade French bread over and over again.
What is the secret of the baguette?
The secret of the baguette is its simplicity, patience in fermentation, and the artisan’s touch, turning 4 humble ingredients into something extraordinary.
On one of my early trips to Paris, I reserved dinner at a cozy piano bar/restaurant in the 6th for the night of my arrival. When we sat down, I was still pretty delirious and jet-lagged, so I wasn’t really paying attention to anything other than my friends who were chatting with me.
In fact, for a moment there, I completely forgot I was sitting in a cafe in Paris, France. It wasn’t until I absent-mindedly put a torn piece of baguette from the bread basket into my mouth that I realized I was in my favorite city in the world.

I immediately thought oh my goodness! The bread tasted incredible! Seriously, truly incredible.
It tasted the way bread in France can only taste.
A lot of people ask me how to make homemade French baguettes like that, but non, ce n’est pas possible.
What are the ingredients in a traditional baguette?
In France, the four ingredients of a true French baguette are:
- Flour
- Water
- Yeast
- Salt

What is the baguette rule in France?
The reason baguettes can only have 4 simple ingredients is because of a special rule in France: the famous 1993 “Décret Pain” (Bread Decree).
This law protects the integrity of traditional French bread. It states that:
- A “baguette de tradition française” may only be made with those 4 ingredients, nothing else.
- No preservatives, additives, or artificial enhancers are allowed.
- It must be mixed, kneaded, fermented, and baked on the premises where it is sold.
That’s why when you buy “une tradition” in France, you know it’s fresh, handmade, and purely crafted.

What makes French baguettes so good?
If you’ve tried replicating baguettes at home and thought to yourself, why don’t they taste as good as they do in France, just know that it’s not because you’re not a great baker.
Even great chefs in American bakeries can never deliver true French baguettes. French bread tastes so good because French bread is, simply put, French!
What I mean is that French bread is made with French flour, which is produced from French grains. While French flour has various types, with some versions having higher protein content (equivalent to American bread flour) or lower protein content (equivalent to American all-purpose flour), the fact remains that the grain producing that flour is different than the grain producing American flour.
But that doesn’t mean that we can’t make some pretty damn good baguettes at home here in America.
These homemade French baguettes are proof!

How to make homemade baguettes?
Making homemade French baguettes doesn’t have to be an intimidating project.
For this recipe, you don’t use a starter or any other kind of fancy ingredient.
Instead, this bread gets lots of flavor from an overnight rise. Letting the dough rest in a large bowl, covered with plastic wrap in the fridge overnight, allows the yeast to slowly impart its flavor in the dough.

The original recipe I used as inspiration to craft this one called for instant yeast, but I never have instant yeast on hand.
Instead, I activate my dry active yeast with some warm water, and then mix ice cold water into the dough to slow down the yeast process.
There’s hardly any kneading with this easy french baguette recipe. If you’re using a stand mixer, you’ll use the dough hook to do some of the mixing for you.
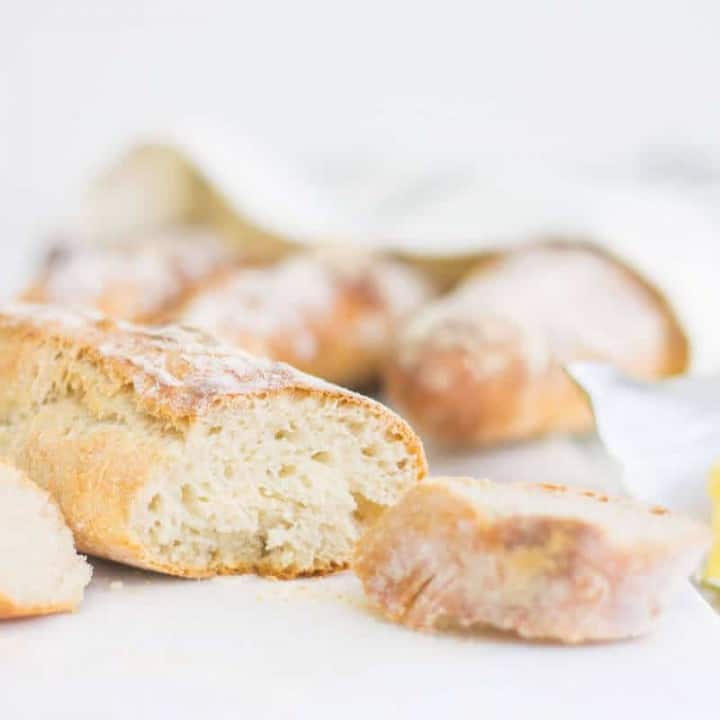
After baking the dough, you’re left with superb French baguettes that have a crispy crust with a soft and chewy interior.
You don’t have to have a baguette pan for this recipe; you can easily use a baking sheet to bake the bread. A baguette pan makes it slightly easier to separate each dough loaf into equal pieces and create that iconic baguette look, but it’s not mandatory.
I have baked these with both, and they both turn out great. One advantage a baguette pan has is that it is usually perforated with tiny holes. This allows the baker to place a dish of boiling water on a bottom rack in the oven to humidify the baguettes rather than having to periodically open the oven door and spray the baguettes with water while they’re baking.
Before baking, you’ll use a sharp knife or a kitchen razor blade to score the top of each baguette, basically cutting a few slashes into the dough. This is done because when bread goes into a hot oven, it has an initial burst of rising called oven spring.
Without scoring, the crust sets quickly and the bread might tear in random spots. Scoring creates “weak points” where the dough can expand gracefully.
It also directs how the bread opens, helping it create airy insides and a balanced crust. It prevents dense spots and allows the loaf to rise evenly.
And oh how airy and perfect are these! The taste of a fresh baguette like this, straight out of your oven, is wonderful!
Spread a little bit of butter onto your warm bread and delight in how irresistibly good it is. While I won’t claim that these are the equivalent to a French baker’s, I do think they are a fabulous alternative when you just can’t make that trip to France!
French Baguettes
Crisp on the exterior and fluffy on the interior, homemade French baguettes.
Ingredients
- 4.5 cups bread flour, plus more for dusting
- 1.75 tsp salt
- 1.5 tsp active yeast
- 1/2 cup warm water, 110°F
- 1.5 cups iced cold water
- olive oil for greasing
Instructions
- To a small bowl, add the active yeast. Follow with the warm water and give the mixture a gentle stir. Let this mixture rest for 5 minutes.
- Combine the flour and salt together in the bowl of a stand mixer using the paddle attachment. Add the yeast mixture and cold water, then continue to mix until a dough forms.
- Once a dough forms, swap in the hook attachment and knead the dough for 1 minute. Stop the mixer and let the dough rest for 5 minutes. Then knead the dough on low speed for another 1 minute, then let the dough rest for 5 minutes.
- Grease your work surface with some olive oil. Turn out the dough onto the oiled surface. Now, grab one end of the dough and stretch it out before bringing the flap in towards the center. Repeat this step for the remaining 3 sides of the dough to create a square pocket shape with a total of 4 flaps that have been folded into the center. Turn the dough over so that all the flaps are facing downward and the smooth side of the dough is facing upward. Let the dough rest for 10 minutes. Repeat this step with the stretching and folding, then let the dough rest for another 10 minutes.
- Lightly grease a large bowl with olive oil, then transfer the dough to the bowl. Cover the bowl with a sheet of plastic wrap; refrigerate the dough overnight. Note: Dough can be refrigerated for up to 4 days.
- The next day, place the covered bowl of dough out on the counter 1 hour prior to baking. After an hour, preheat the oven to 475°F. Now, very gently turn the dough out onto a greased work surface. You want to do this as carefully as possible so as to not disturb the bubbles in the dough.
- Take a bench scraper, knife, or pizza cutter and divide the dough into 2-4 pieces (depending on the size of baguettes you want). The more you divide, the smaller and skinnier your baguettes will be.
- Gently shape the pieces of dough into baguettes by gently stretching and elongating the dough. Sprinkle flour on a baguette pan or a baking sheet and transfer the baguettes to the prepared pan.
- Sprinkle a touch of flour on the top of the baguettes, then use a sharp knife to score the baguettes. You'll want to cut a few slits (each about 1/4" to 1/2" deep) in the top of the baguettes.
- Bake the baguettes on the middle rack for 16 to 20 minutes until golden brown (baking time will depend on the size of the baguettes) and your type of oven. Throughout the baking process, use a spray bottle to spray water into the oven (in the space above the baguettes) every few minutes. Cool the baguettes on a wire cooling rack. (see note)
Notes
You can bake your baguettes longer for a darker and crisper crust, but just keep a watchful eye on them so they don't get too dark or burn.
To turn this dough into focaccia bread, simply follow the recipe card as instructed, but instead of shaping the dough into baguettes, spread the dough out onto half of a standard rectangular baking sheet. Make sure you oil the baking sheet first before adding the dough. Once you've spread out the dough, use your index finger to poke into the entire surface of the dough to create slightly indentations. Drizzle olive oil all over the top, then sprinkle rosemary leaves and coarse sea salt all over the top. Bake at 475°F for 22-25 minutes, until golden brown. 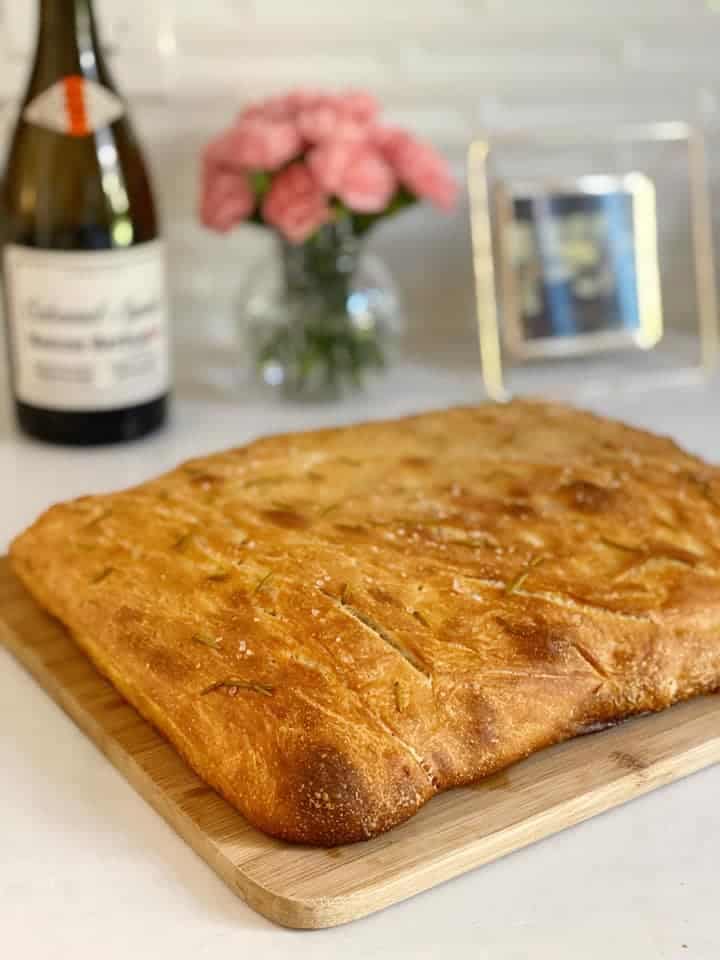
Nutrition Information:
Yield: 3 Serving Size: 3 ServingsAmount Per Serving: Calories: 660
SaveSave

Beautifully executed my dear! But I’m longing to know, what kind of bread flour you used? Was it 00 flour? I’ve never tried it but am curious of it’s performance and flavor. I’ve never had a real French baguette in Paris, but I can only image there is a marked difference in our’s here in the states. Delicious work Beeta! Thank you for sharing. I’m totally inspired!
I use King Arthur’s bread flour as I’ve always had great results with it! I have heard that 00 flour can have more depth of flavor and chewiness, but I’ve never tried it. I know 00 is a bit more pricey than KAF’s bread flour so maybe I would use 00 for something like pizza crust, which only requires a cup of flour vs a baguette recipe like this that uses 4 1/2.
Thanks so much for your kind comment!! <3
I love how that bite of bread brought a wave of realization, "I’m in Paris, France!!" It’s a fact, the French have perfected the baguette. We ate them every single day of our trip – I ever bought an open topped handbag when we were there so I could easily slide the bagged loaf, so just the end poked out. Oh the end! Torture to wait until we got back to the apartment for that crackly bite.
Beeta, you continue to amaze me with your talent. These baguettes may not be French, but they’re gorgeous – clearly baked with love and a passion for quality. I’m going to try a batch and surprise our neighbors with a fresh loaf. xoxo
Oh, Marissa! I can completely relate – waiting to get home for a bite of the baguette is just torture! Thank you so much for your kind words, friend. You are always so supportive – I so appreciate it! XO
J’aimerais bien prendre mon petit déjeuner avec tes "french baguettes". Elles sont dignes d’une boulangerie à Paris ! xoxo
Aww, merci, Eva! Je fais les baguettes pour vous a tous moment! <3
It is hard to recreate French bread because they take it so seriously. Unlike our bread that lasts for days, a day old French baguette is normally so hard that you could do someone an injury with it. Yours look perfect! I have never made baguettes but you make them look easy Beeta! xx
Thank you, Louise! It’s actually fascinating how baking bread is a trade passed down through generations – it explains why they have such good bread!
Homemade baguettes are the BEST!! I’m assuming Parisian baguettes are too, but having never been there…(gosh I want to visit so much!). I’ve made baguettes like this before in a baguette pan, but here in Melbourne I don’t have it with me – do you use a pan or put them straight on a baking tray? Wasn’t sure if they would spread out too much! x
Thanks, Claudia!! I’ve used both a baguette pan and a baking sheet. They don’t really spread so no worries about that! I prefer a baguette pan thought because I like that the baguette pan is perforated so you get more from the steam effect that you’ve created below the pan, and they make those cute little dots on the bottom of the baguettes like the ones you see in the bakery/store! 🙂
I cannot wait to one day go to Paris and taste one of their magnificent baguettes and a few macarons as well. These loaves look beautiful Beeta, absolutely perfection!
Thanks so much, Jess! You would love a Parisian baguette (and macaron)! <3
One day I WILL get to Paris… and the first thing I am going to do is shove a bunch of french baguettes right into my mouth. 🙂 But until then, I will make and devour these perfectly American French baguettes! 😉 You are the best baker, Beeta, and this bread is just further proof of that. Absolute perfection, my dear! Cheers! xo
Yes, baguette stuffing is a must when you visit!! 😉 Thank you so much for your sweet comment – you’re too kind! Lots of love XOXO
I have always been intimidated by making French baguettes, but this recipe doesn’t sound that hard. I love crusty breads and French baguettes are a dream come true when it comes to crust.
I am curious, what brand of flour do you use for these baguettes?
Oh I’m so glad you asked that question because I just noticed that I had listed AP flour instead of bread flour! I swear I read that recipe card at least 3x; it’s probably because I use AP flour so much I didn’t even realize. Anyways, I always use King Arthur’s flour (both AP and Bread). I buy the AP in the 25 lb. size at my local bulk discount store because I go through flour so quickly! ;p Thanks so much, deary!
Wondering what your answer was: did you want us to use AP flour or bread flour for this recipe? I’d like to try to make these baguettes but want them to turn out right!
Hi! You’ll want to use bread flour. 🙂 Enjoy!